
Having a weak infill 3D print is a problem that can ruin your printing expectations. Structure, weight, and strength are crucial factors that come into play when trying to achieve the perfect print. Sometimes you will notice it at bare sight, and at others, you will think that everything went well, but on the inside, things are tearing apart.

In this guide, you will understand what a weak infill is. Also, we are going to explain what are the main causes and solutions of a weak infill. In addition, we will dive deep into what percentage of infill you should use & what pattern of infill you should use. Even if you use PLA+, PETG, or ASA, take these next steps into consideration to avoid weak infill 3D printing.
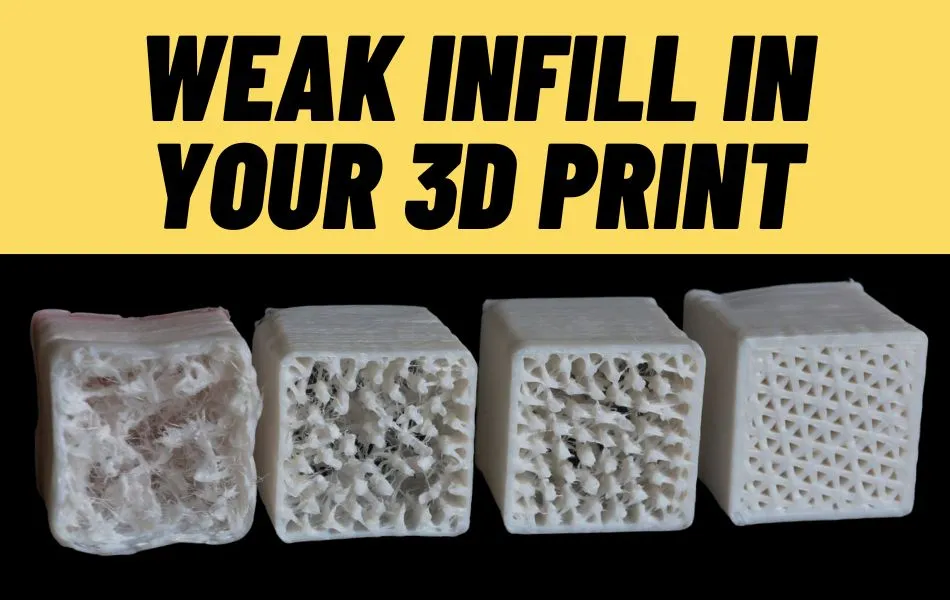
What is a Weak Infill 3D Print?
The infill is the connector of the outer shells of your print. It must be able to support the upper surfaces that will print on top of the infill. If your infill appears stringy or weak, you should consider adjusting a few settings within the software to add additional strength to your print.
Main Causes of a Weak Infill
Wrong Infill Patterns
Consider analyzing the patterns you are using to infill your print. To find this setting, go into the Infill Tab under your printer settings. The IFP (Internal Fill Pattern) determines the internal structure of your print. Depending on your project, you might want a more solid or flexible infill.
On the one hand, if you are looking for a strong infill, you can choose Grid, Triangular, and Solid Honeycomb infill patterns. On the other hand, Rectilinear and Fast Honeycomb may exchange for faster printing speeds. If you are having trouble producing strong reliable infill, try a different pattern to see if it makes a difference.
High Printing Speed
Usually, the infill is printed faster than any other part of your 3D model. If you print too fast, your extruder won’t keep up a balance between quality and speed. You will be able to notice Under-Extrusion on the inside of your print. If this happens, you will notice a weak, stringy infill since the nozzle can’t extrude as much plastic as the software would like.

To reduce your 3D printing speed, select the Speed tab under your slicer Settings. Adjust the Printing Speed, which directly controls how fast your infill prints. For example, if you were previously printing at 3600 mm/min (60 mm/s), decrease it by 50% to see if the infill starts to become solid and stronger. Reducing the speed will help you avoid a weak infill 3D print.
Low Infill Extrusion Width
To modify this feature, under your settings, you will be able to find Infill Extrusion Width. Changing the extrusion width will help you create stronger, and thicker walls, improving the quality of your print. For the outline perimeters, you could use a very fine 0.4mm extrusion width, but the transition to a 0.8mm extrusion width for the infill. With this being said, the infill extrusion will be twice as thick as the outline perimeters.

One thing to keep in mind when adjusting this setting is that the software must also maintain the infill percentage that you specify. So if you set the infill extrusion width to 200%, the infill will use twice times as much plastic for each line. To keep the same infill percentage, the infill lines must be spaced further apart. For this reason, many users tend to increase their infill percentage after increasing the infill extrusion width.
